Creating Popups in Power BI
I had a discussion with my good friend and former colleague Mathilda Bäckman today regarding Power Automate in Power BI. The idea is awesome! You put a button in your report and give the end user the ability to take action with filtered date from the report directly without having to export any lists or such.
The problem is that it’s instant. You accidentally click the button and boom, you’ve just started the flow and perhaps made a big mess! Me and Mathilda came to the conclusion that a popup would be a great way of solving this and so I wanted to share our solution so that you may benefit from it too!
I’ve built this into the Sales Sample report so that you can easily test it yourself! On this page of that report, there’s a Power Automate button on the upper right side to enroll owners into Sales training.
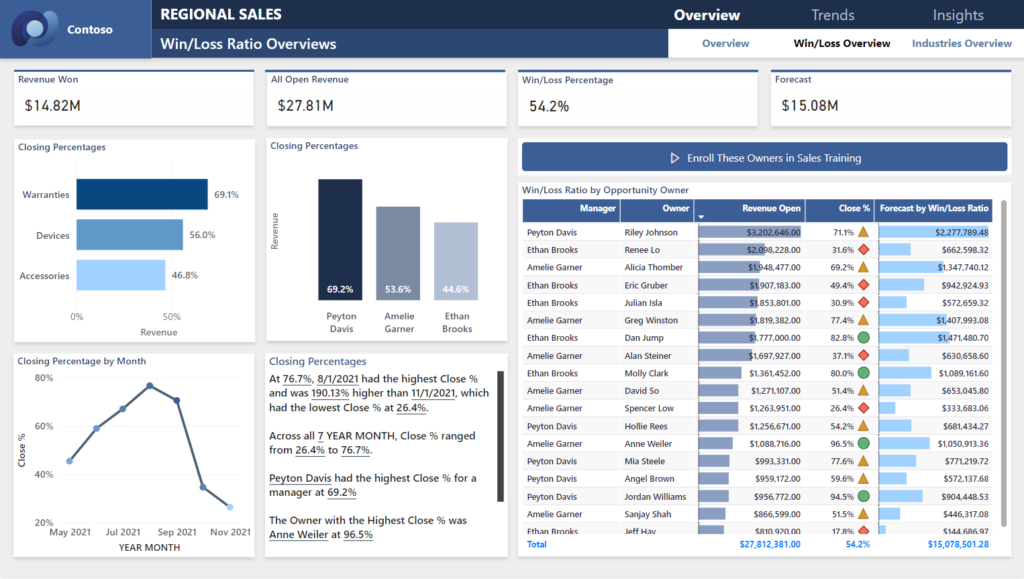
Step 1 – I hid that button and replaced it with a new one. (To hide the object, you need to make sure Navigation is opened under the View-tab. Open the Bookmarks too while you’re here)

Hide the old button for now

Add a new button


For now, the button doesn’t do anything at all though.
Now let’s create 2 bookmarks! Use the Add button on the bookmark pane. I named mine “Popup – Show” and “Popup – Hide”. Deselect “Data” and make sure you have selected “Selected visuals” instead of the default “All Visuals” for both of these bookmarks.

Now I went to the insert tab and added a recantgle!

I made it white and only 10% transparent.

This rectangle covers the entire canvas now, making the everything slightly faded.
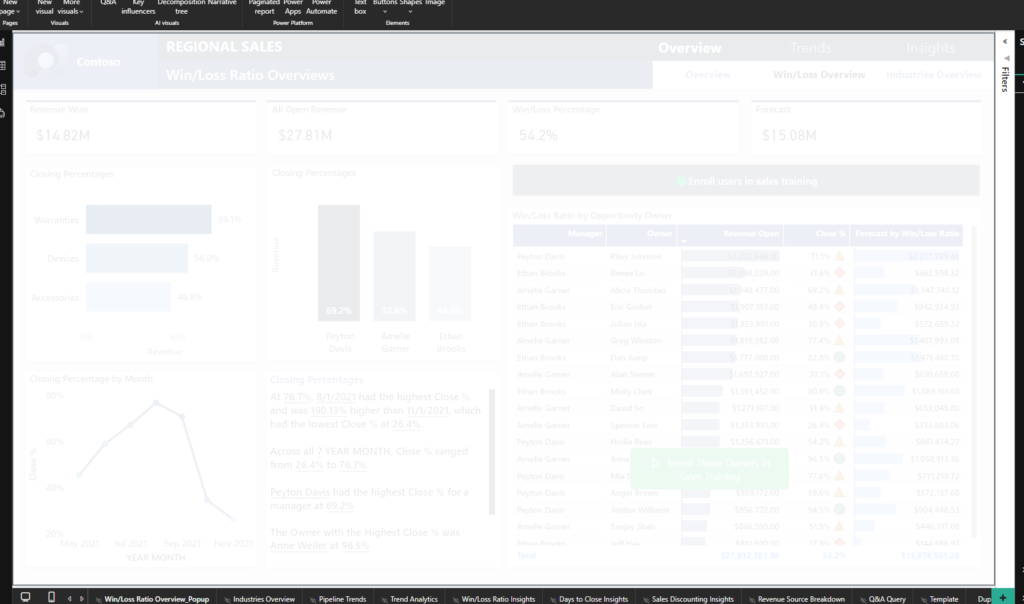
I then added a few more objects, another rectangle to act as the window of the popup, a text, a separating line, a copy of the list of users from the previous screen and a card that just counts the number of users from the Owners table.
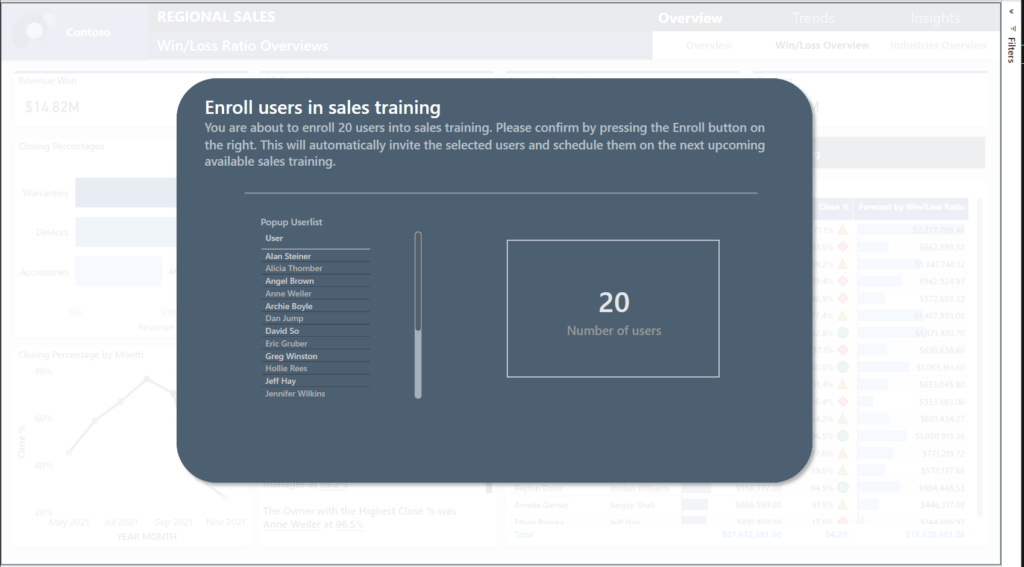
To get the text to dynamically display the number of users, you can add “Value” while in the text editor like this:

Now I display the PowerAutomate button again and also add another blank button that I named “Cancel” and made red. Make sure to move the buttons above the fader and background of the popup, otherwise they would end up behind these objects and you wouldn’t see them. Kind of defeats the purpose of them.
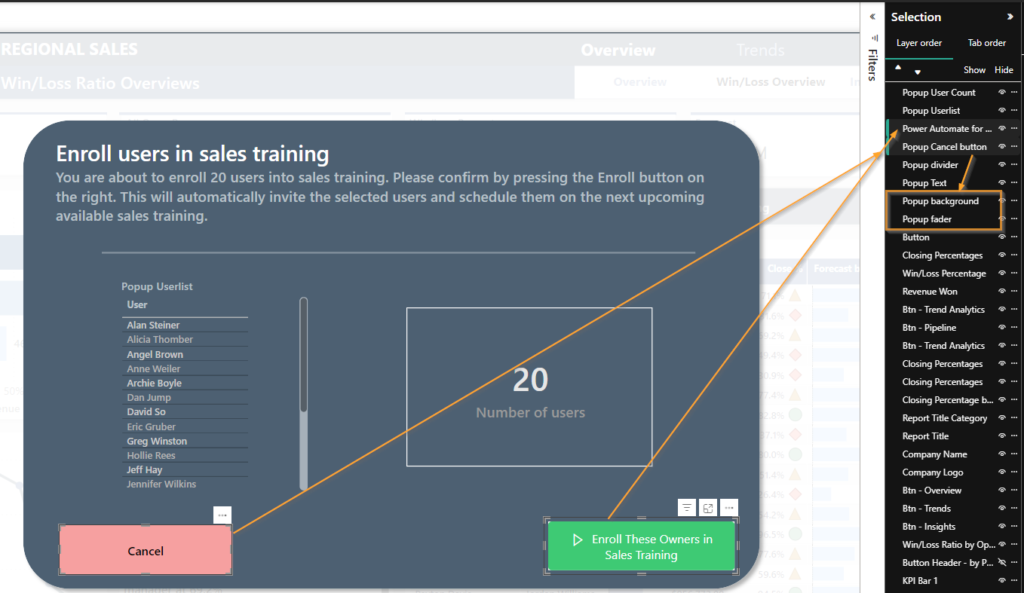
OK time to update the bookmarks! Now that we have all objects in the Popup, select them all by holding the CTRL key and click on them in Selection pane. When they’re all selected, right click on the Bookmark named “Popup – Show” and select “Update”.

Now go through all of the objects and hide them, using the Eye-icon on the selection pane. When they’re all hidden, make sure they’re all selected and then update the bookmark named “Popup – Hide”.

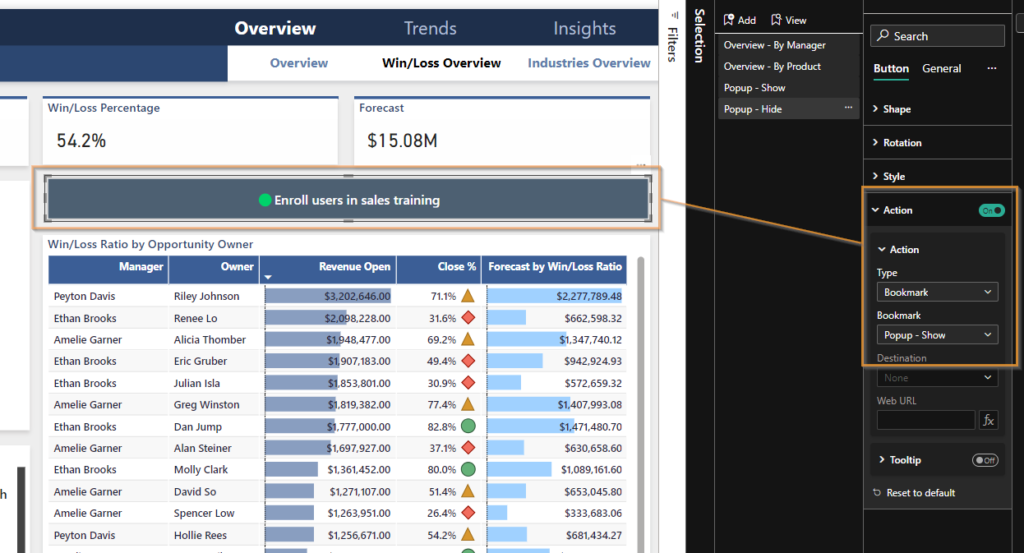
Now it’s time a add the bookmarks to our buttons. On the first page, with the popup hidden, select our first button we created and add the action of calling the bookmark “Popup – Show”
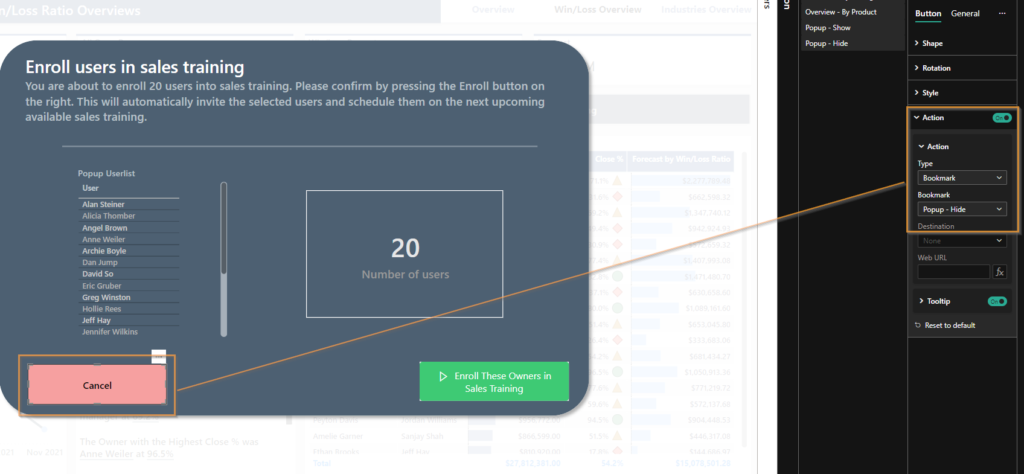
Now open the popup and set the Cancel button to “Popup – Hide”.
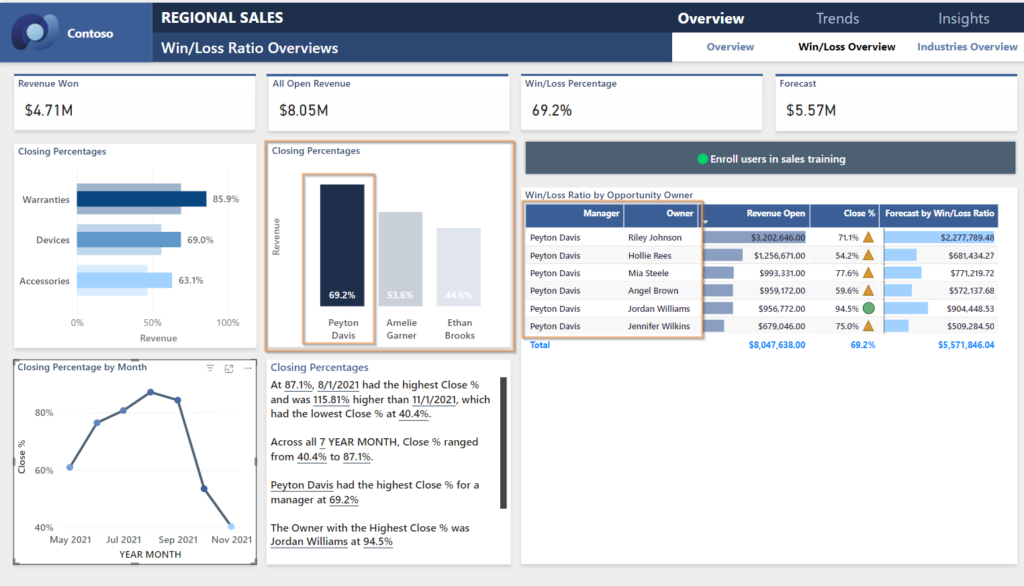
Let’s try it out!
I’ve selected one of the managers and this have filtered out a subset of users.
If I now click the button to enroll these users, the popup show that it will effect only these 7 users and I can easily spot errors!
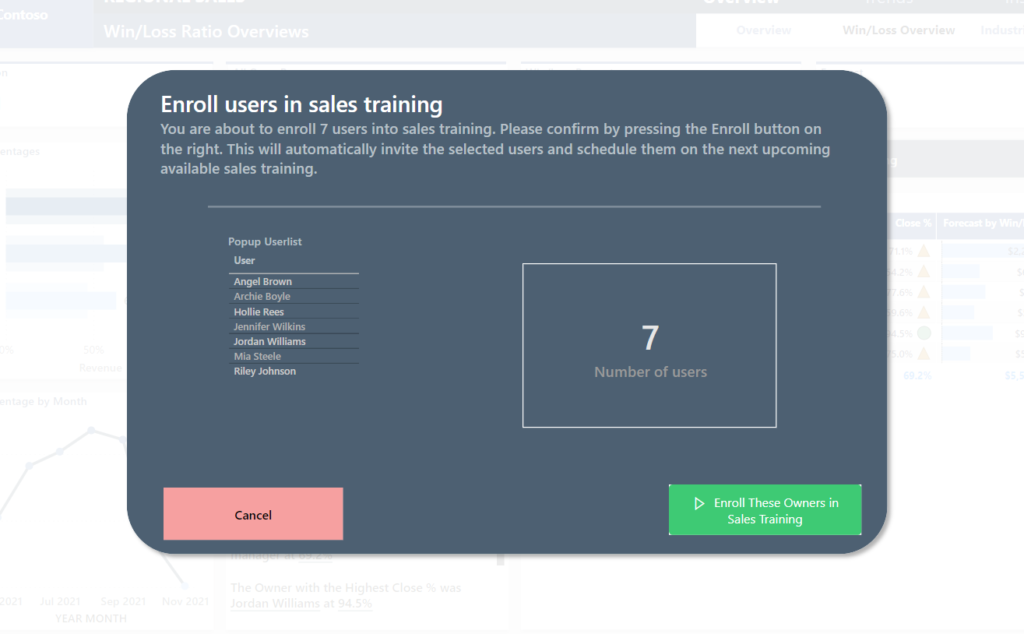
From here, I can also select a couple of users manually from the list by holding the CTRL key and now I can enroll only those into the sales training, so I don’t have to back to the previous page for that.
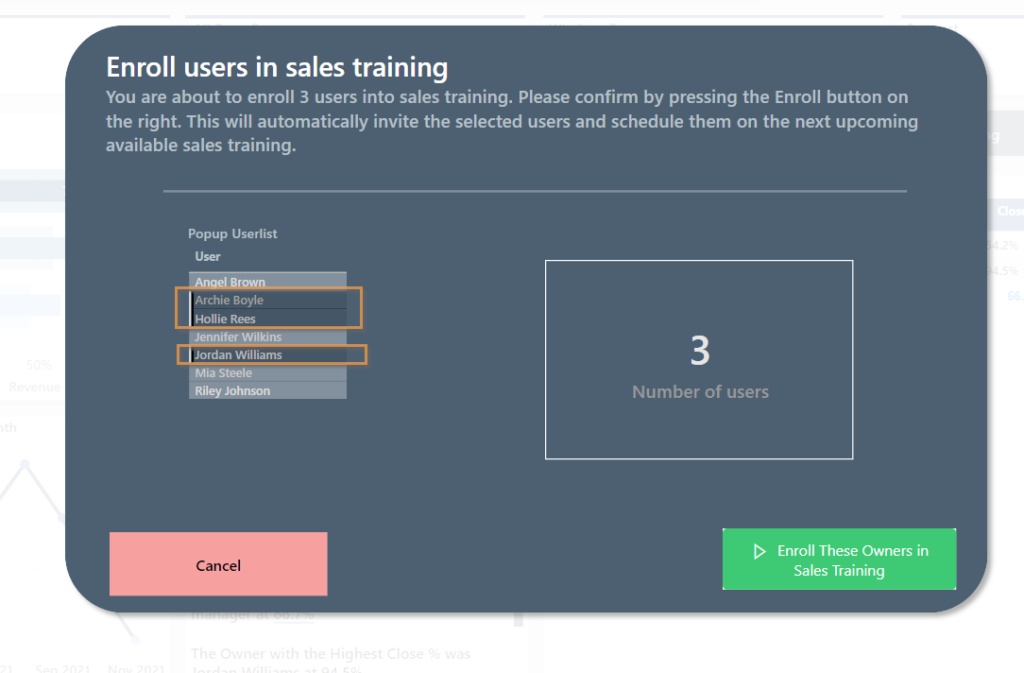
Here it is in action!
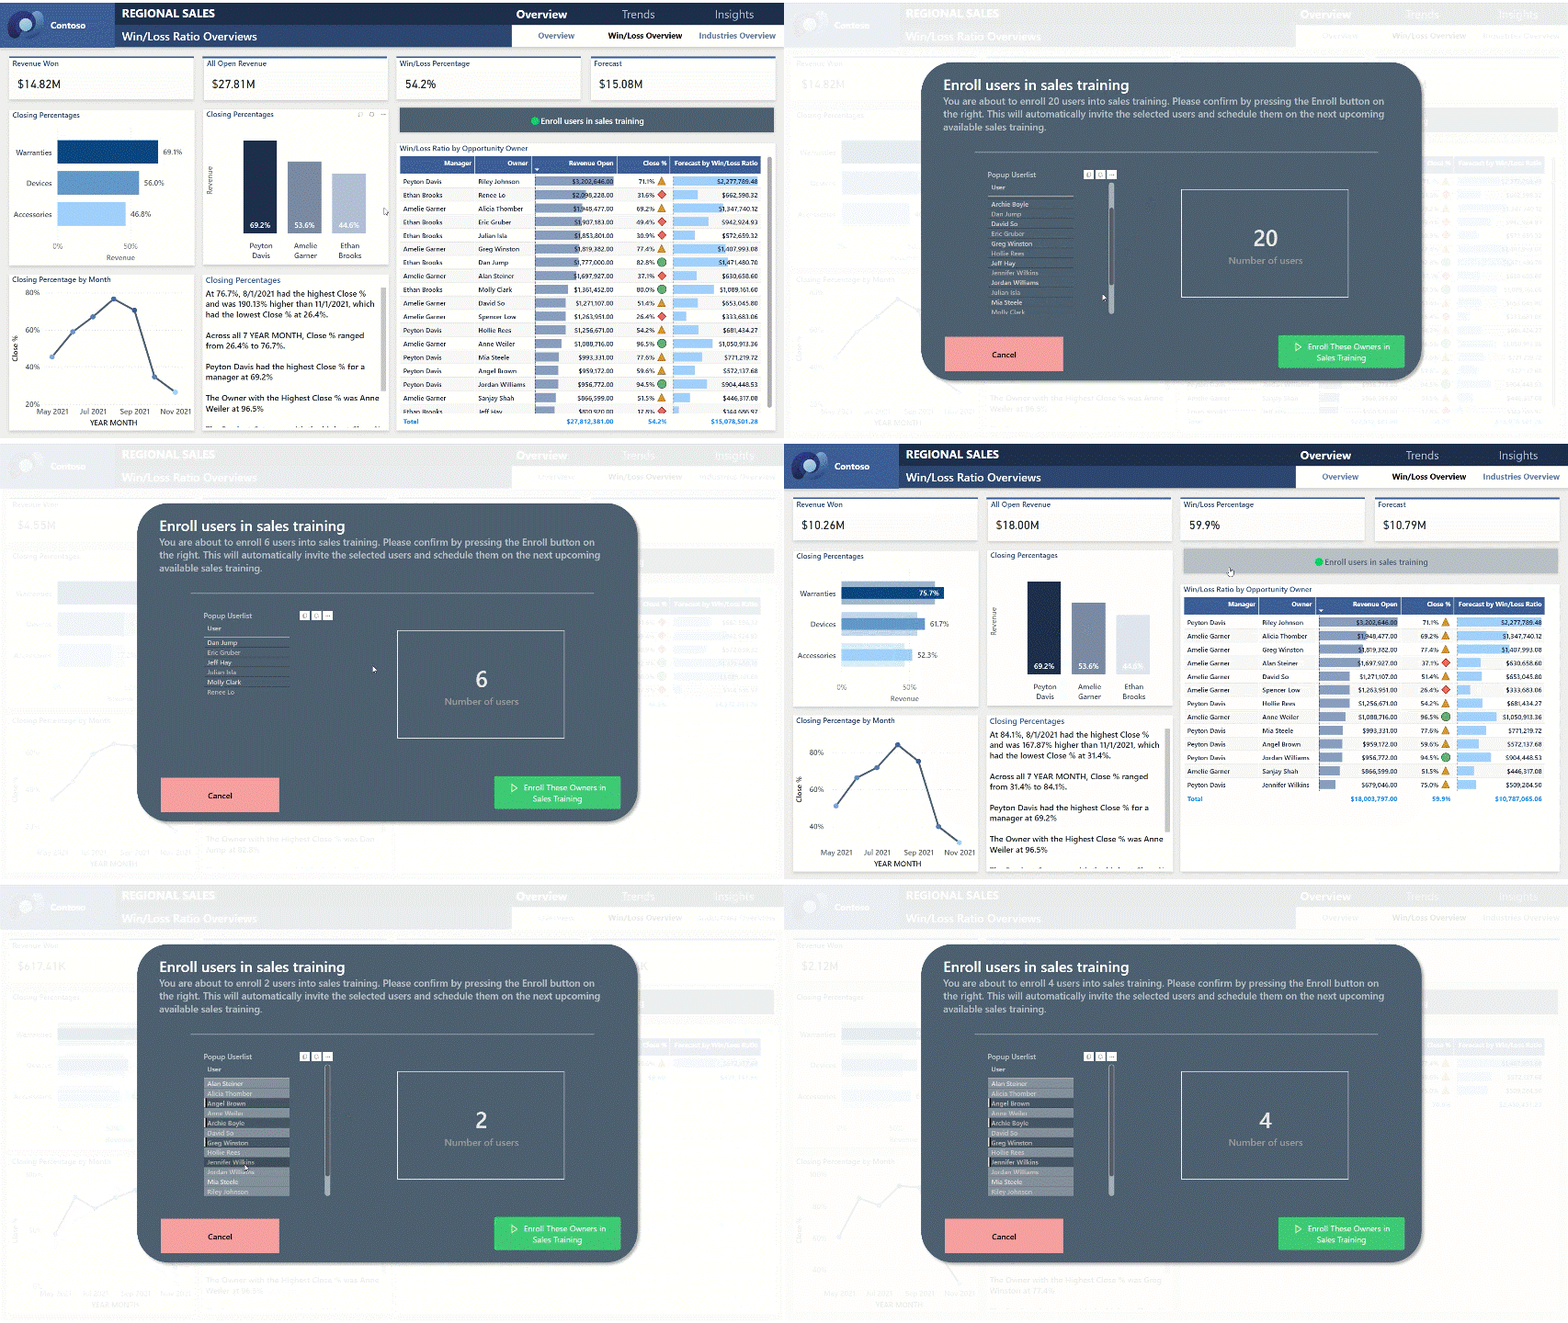
Leave any questions or feedback in the comments!
Cheers!